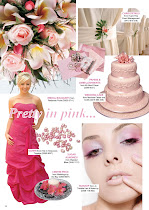
wedding by [...diablilla...] on Polyvore.com

Tuesday, February 23, 2010
Friday, December 18, 2009
Wednesday, December 16, 2009
Tuesday, December 15, 2009
Monday, December 14, 2009
Wednesday, October 21, 2009
Supplier Spotlight: Wedding Notes by Kiki K


· Hard card cover
· 16 tabs: Budget, Guests, Stationery, Dress, Rings/Beauty, Flowers etc...
· Lined pages
· Elastic band closure
· Pocket at the back
· 141mm x 197mm
Tuesday, October 6, 2009
Behind the Cost of Weddings Tip 1 Invitations
Yuck. Money. The subject no one wants to talk about but we all have to deal with, especially when it comes to weddings. And it's no secret that weddings are expensive - even an intimate, backyard ceremony with a handful of guests can stretch the wallet fairly quickly. I wanted to get into the reasoning behind some of the common price tags and help put some of the sticker shock at ease.
The time-tested adage "you get what you pay for" has been proven over and over again with weddings. You don't need to break the bank on your wedding or try to keep up with the Joneses - but it is important to go into the wedding planning process with an understanding of where your money is going so that you can best prioritize its use.
By Liene Stevens www.blueorchidblog.com
Image: event THIS
Monday, July 20, 2009
Helpful Hint: Addressing an Invitation Envelope
Here are some guidelines from Australia Post.
Envelope Layout
It is important the zones on the envelope, indicated below, are observed at all times.
General Addressing Tips
- Use the correct postcode – don’t guess it if you don’t know it. The postcode should be the last item in the address.
- Use clear print– Print clearly using dark ink, preferably black on white. Red, yellow or orange inks should be avoided.
- Keep the address straight – the address lines should be parallel to the bottom of the envelope
- Don’t indent or stagger address lines – each line of the address should start at the same point on the left hand side
- Space words correctly – leave one or two character spaces between the place name or post office of delivery and the State or Territory abbreviation, and the same amount of space between the State or Territory abbreviation and the postcode.
- Don’t underline anything – no words in the address should be underlined.
- Include a return address – place the sender’s address in the top left corner, or on the back flap of the envelope. This ensures we can return the letter if it can’t be delivered.
Typically, the address should be written in three lines:
1. The top line should contain the recipient’s name
2. The second last line should contain the number and name of the street, or PO Box or locked bag number if applicable
3. The last line should contain the place name or post office of delivery, State or Territory abbreviation and postcode. This line should be printed in capitals without punctuation or underlining.
For overseas mail the country name should be in capitals on the bottom line.
· company or property name
· non-address information, e.g. Attention M/s

Machine (Printer) Addressing Tips
· Use clear readable type. Ensure the print characters in the address do not touch or overlap. Australia Post recommends using a fixed pitch type font such as Courier 12 point, 10 pitch
· Replace worn out ribbons or cartridges.
· Addresses in window panel envelopes should be clearly visible through the window. No other information should appear through the window, together with the address, even if the contents should move.
· Don’t use Postcode Squares for machine-addressed letters even if they are pre-printed on the envelope.
Hand Addressing Tips· Use envelopes pre-printed with the four Postcode Squares.
· Print the four numerals of the destination postcode clearly within the Squares.
· Do not use the Squares on hand addressed envelopes for overseas addresses - even if the overseas postal code can fit into the Squares.
· Print the place name and state or territory abbreviation on the bottom line in capital letters.
For more information vist www.auspost.com.au
Sunday, July 19, 2009
Product Profile: Paper Style by Cristina Re

This is a fantastic book if you are “crafty” and want to try your hand at DIY stationery (weddings or any occasions).Creative brides will delight in this easy step-by-step guide to gorgeous do-it-yourself wedding stationery. Lovingly researched and beautifully written this special wedding edition of Paper Style includes stunning full-colour photography and lovely hand-drawn illustrations.
With hundreds of handy tips, techniques and essential templates Paper Style contains everything you need to create unique and stylish invitations, cards and so much more!
This 176 page hardcover, fabric-bound book is the perfect gift for any bride-to-be!
At a glance:
· Over 100 of the most popular craft projects
· Step-by-step instructions and visuals
· Designer secrets, tips & techniques
· Inspirational colour themes and stories
· Exclusive and easy to use templates
RRP: $49.95
For more information visit www.cristinare.com
Never fear if you are not a “crafty” DIY person event THIS can create beautiful handmade invitations for any occasion, visit www.eventthis.webs.com for more information.

Friday, July 3, 2009
Design Spotlight: Vintage Charm Menu

We had a little fun with the peg embellishment & tagline of eat, drink & be married!
Visit www.eventthis.webs.com & view the event gallery.