




 Posts




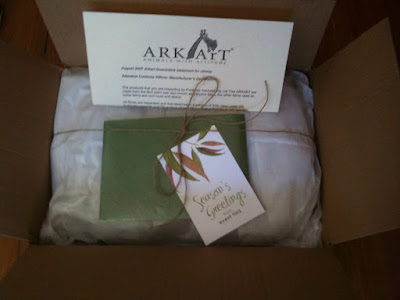
Now that you have seen the process & pictures of what I sent out to my international colleagues I wanted to show the great cards and ornaments I received from the international other swappers.
What was great about both swaps is that you really didn’t have any idea what to expect and all of the items were so different, which reflected each swappers style, location or personal touches.
The only issue I had with the swap was that unfortunately Australia Post decided to strike a few days out from Christmas so I just received my last ornament yesterday! But it was worth the wait!
I also had some great feedback and comments from my original post::
@kerrylynnequade:: @eventTHIS I LOVE your posts! I'm totally in on the ornament swap next time but in the meantime we'll have to devise a spring swap!
@ido_ityourself:: @eventTHIS thanks so much they look great, love the string on the card
@LaraCasey We LOVE your ornament so much! Thank you for the very special package and for putting so much heart and thought into this. I hope we get to meet someday soon!
Jenn said... They turn out so well :) love it
Emily @ Southern Weddings said... So cute, Jazz! Thanks so much for participating!
@ido_ityourself {FaceBook}:: Some lovely feedback from event THIS who used our wedding thank you cards as Christmas cards!
Whitney said... We absolutely loved your Aussie inspiration! Thanks so much for participating.
@CP_eventsATL:: @eventTHIS love the blog posts! I loved your ornament :)
Cristina Perry:: Love this...you inspired me to write a similar blog post in hopes that others will read it and participate next year! I absolutely loved your ornament. I am a huge animal lover so I was super excited to see the little koala bear when I opened your package.
Brooklyn Brides Third Annual Holiday Card Swap (with a Tasty Twist) – 3rd year running!
Vané Broussard {Brooklyn Bride} www.bklynbrideonline.com
What I loved about this card was the concept of designing a shoot and using it as a Christmas Card, fantastic idea and very mod!


Glazed Lemon Cookies (from Real Simple Dec 2008)
Recipe from Vané Broussard
Makes 48 cookies Hands-On Time: 20m Total Time: 1hr 45m
1 1/2 sticks unsalted butter, at room temp 2 cups all-purpose flour
3/4 cup granulated sugar 1 cup confectioners' sugar
2 large egg yolks 2 tablespoons fresh lemon juice
1/2 teaspoon pure vanilla extract 1 teaspoon grated lemon zest
1/4 teaspoon kosher salt
1. With an electric mixer, beat the butter and granulated sugar until fluffy. Add the egg yolks, vanilla, and salt and beat to combine. Gradually add the flour, mixing until just incorporated.
2. Divide the dough in half and shape into 1 1/4-inch-diameter logs. Wrap in wax paper and refrigerate until firm, about 30 minutes.
3. Heat oven to 350° F. Slice the logs into 3/8-inch-thick pieces and space them 1 1/2 inches apart on parchment-lined baking sheets. Bake until lightly golden, 16 to 20 minutes. Let cool on the baking sheets for 5 minutes, then transfer to cooling racks to cool completely.
4. In a small bowl, whisk together the confectioners' sugar, lemon juice, and zest until it forms a thick but pourable glaze (add more lemon juice if necessary). Dip the top of each cookie into the glaze and let set, about 15 minutes.
To freeze: Instead of refrigerating the dough, freeze the logs for up to 2 months. To bake, follow the recipe instructions, cutting and baking the dough from frozen, and use the upper end of the time range.
“I made these cookies for Christmas last year and they were such a hit, I’ve already gotten requests for them again this year!”
Danielle Harder
Such a stunning traditional style of Christmas card - loved the little touch of green glitter on the Christmas Tree and the logo design of "wishing you a Magical Christmas" inside the card!


Twixie Shortbread Bars
Recipe from Danielle Harder
Makes: 48 bars Prep: 35 minutes Chill: 1-1/2 hours Bake: 20 minutes Cool: 10 minutes
1-1/2 cups butter, softened 3/4 cup whipping cream
1/2 cup sugar 6 tablespoons butter
1-1/2 teaspoons vanilla 3 tablespoons light-colored corn syrup
3 cups all-purpose flour 12 ounces semisweet chocolate, chopped
1 13.4-ounce can dulce de leche
3/4 teaspoon vanilla
1. In a large bowl, beat 1-1/2 cups butter with an electric mixer on medium to high speed for 30 seconds. Add sugar and 1-1/2 teaspoons vanilla; beat until combined, scraping sides of bowl
occasionally. Beat in as much of the flour as you can with the mixer; stir in any remaining flour. Cover and chill for 30 to 60 minutes or until dough is easy to handle.
2. Preheat oven to 350 degrees F. Line a 13x9x2-inch baking pan with foil, extending foil over edges of pan. Press dough evenly into bottom of prepared baking pan. Bake for 20 to 25 minutes or until top is lightly browned. Cool in pan on a wire rack.
3. Spread dulce de leche in an even layer atop cooled crust. In a medium saucepan, heat whipping cream, 6 tablespoons butter, and the corn syrup to boiling over medium heat, stirring to dissolve syrup. Remove from heat. Add chocolate and vanilla to saucepan. Do not stir. Let stand 5 minutes. Stir until smooth. Let stand 10 minutes at room temperature to cool slightly. Slowly pour chocolate
mixture over dulce de leche layer, spreading evenly. Cover and chill 1 to 2 hours or until chocolate layer is set.
4. Layer bars between sheets of waxed paper in an airtight container; cover. Store in the refrigerator for up to 3 days or in the freezer for up to 3 months. Use the foil to lift uncut bars out of pan. Cut into bars.
To Serve: If desired, cut bars into smaller and/or larger squares and place on serving platter.
To Store: Layer bars between sheets of waxed paper in an airtight container; cover. Store in the refrigerator for up to 3 days or in the freezer for up to 3 months.
Kerry Quade www.marriedtobrooklyn.com
Totally love the letterpress type embossed card so cute and the colour is so striking! Love the message - Peace on Earth!


Molasses Spice Cookies
Recipe from Kerry Quade
(5 c) 1 cup granulated sugar (5 tsp) 1 tsp ground cloves
(3 3/4 c) 3/4 cup shortening (5 tsp) 1 tsp ground ginger
(1 1/4 c) 1/4 cup molasses (1 1/4 tsp) 1/4 tsp dry mustard
(5) 1 large egg, beaten (1 1/4 tsp) 1/4 tsp salt
(10 c) 2 cups all purpose flour (2 1/2 c) 1/2 cup granulated brown sugar
(10 c) 2 tsp baking soda (5 tsp) 1 tsp ground cinnamon
Preheat oven to 375 F. Grease cookie sheets and set aside. Beat granulated sugar and shortening about 5 minutes in large bowl until light and fluffy. Add molasses and eggs; beat until fluffy. Combine flour, baking soda, cinnamon, cloves, ginger, mustard and salt in medium bowl. Add to shortening mixture, mix until just combined. Place brown sugar in shallow dish. Roll tablespoonfuls of dough into 1 inch balls; roll in sugar to coat. Please 2 inches apart on prepared cookie sheets Bake 15 minutes or until lightly browned. Let cookies stand on cookie sheets 2 minutes. Remove cookies to wire racks; cool completely. Makes about 6 dozen cookies.
This recipe is from Haystack Mountain School of Crafts in Deer Isle, Maine. One of my fave places to visit each fall and I finally got Rose the cookie lady to give up one of her recipes! She bakes large batches as per the notes in parentheses.
Ashley Raydo http://magpiesmagnolias.blogspot.com
Cute concept of incorporating the Christmas Gift tag on the Christmas card - very cool!


Jazz Tyrril-Smart www.eventthis.webs.com


The ANZAC Biscuit
Recipe from Jazz Tyrril-Smart
1 cup (150g) plain flour 125g butter
1 cup (90g) rolled oats 2 tbs golden syrup
1 cup (85g) desiccated coconut 1 tsp bicarbonate of soda
3/4 cup (155g) brown sugar
Preheat the oven to 160°C. Line two baking trays with non-stick baking paper.
Sift the flour into a large bowl. Stir in the oats, coconut and brown sugar.
Put the butter, golden syrup and 2 tbs water in a small saucepan.
Stir over a medium heat until melted. Stir in the bicarbonate of soda.
Pour the butter mixture into the flour mixture and stir until combined.
Roll level tablespoons of mixture into balls. Place on the trays, about 5cm apart.
Press with a fork to flatten slightly.
Bake for 10 minutes or until golden brown.
Set aside on the trays for 5 minutes, then transfer to a wire rack so it cools completely.
Southern Weddings Magazine “Holiday Ornament Swap”
April McEwen www.aprilmcewen.blogspot.com
Christmas ribbon was a great touch, handmade Christmas Tree ornament with sequins (got to love the bling)!


Katie Bond www.Twitter.com/ksbond
Beautifully packaged and a great reflection of Nashville! Love the card - looks like it was a fab wedding!


Simply elegant! Loved the eyelet in the business card - great idea!

Ho Ho Ho Y'all - so Southern! Traditional Santa signed by all the girls from SWM!


Jazz Tyrril-Smart www.eventthis.webs.com


Thanks to Brooklyn Bride and Southern Weddings Magazine for coordinating these great swaps!